
로딩 중이에요... 🐣
15 응답 쿠키, 헤더, 상태코드 처리 | ✅ 저자: 이유정(박사)
아래 코드는 실제 개발시 사용가능하며 각자 개발에 맞게 필요부분을 수정하여 사용합니다. 1.
회원가입 → 비밀번호 암호화 → 회원 정보 저장 → 토큰 생성 → 쿠키에 담아서 응답
- 회원가입 시 비밀번호 해싱 및 쿠키를 통한 세션 토큰 설정 코드
from fastapi import FastAPI, Response, HTTPException, Form
from passlib.context import CryptContext
from fastapi.responses import JSONResponse

app = FastAPI()

# 비밀번호 해싱 설정
pwd_context = CryptContext(schemes=["bcrypt"], deprecated="auto")

# 가상의 사용자 DB으로 실제 개발시 User모델과 연동
fake_users_db = {}

# 1. 회원가입 엔드포인트
@app.post("/signup")
def signup(
    username: str = Form(...),
    password: str = Form(...),
    response: Response = None
):
    # 1. 아이디 중복 확인
    if username in fake_users_db:
        raise HTTPException(status_code=400, detail="이미 존재하는 사용자입니다.")

    # 2. 비밀번호 해싱
    hashed_password = pwd_context.hash(password)

    # 3. 사용자 정보 저장
    fake_users_db[username] = {
        "username": username,
        "hashed_password": hashed_password
    }

    # 4. 토큰 생성 (간단한 예시, 실무에선 JWT 사용)
    session_token = f"token-{username}"

    # 5. 쿠키에 토큰 심기
    response.set_cookie(
        key="sessionid",
        value=session_token,
        httponly=True,
        max_age=3600
    )

    # 6. 응답 반환
    return {"message": f"{username}님, 회원가입이 완료되었습니다."}
응답 헤더를 통한 API 버전, 언어, 캐시 제어 설정 코드
from fastapi import FastAPI, Response

app = FastAPI()

@app.get("/api/info")
def get_api_info(response: Response):
    # 1. API 버전을 응답 헤더에 포함
    response.headers["X-API-Version"] = "1.0.0"

    # 2. 응답의 언어 정보를 지정 (영문 기준)
    response.headers["Content-Language"] = "en-US"

    # 3. 응답 캐싱 금지 (보안 또는 최신 데이터 유지 목적)
    response.headers["Cache-Control"] = "no-store"

    # 4. 응답 본문(JSON)
    return {
        "service": "MyApp",
        "description": "This API provides application information.",
        "status": "operational"
    }
JSONResponse를 활용한 사용자 등록 응답 구성 (쿠키 + 헤더 설정 포함)
from fastapi import FastAPI, Response, HTTPException, Form
from passlib.context import CryptContext
from fastapi.responses import JSONResponse

app = FastAPI()

# 비밀번호 해싱 설정
pwd_context = CryptContext(schemes=["bcrypt"], deprecated="auto")

# 가상의 사용자 DB (실무에선 실제 DB로 대체)
fake_users_db = {}

# 회원가입 엔드포인트 (쿠키 + 헤더 설정 포함)
@app.post("/signup")
def signup(
    username: str = Form(...),
    password: str = Form(...),
):
    # 1. 사용자 중복 확인
    if username in fake_users_db:
        raise HTTPException(status_code=400, detail="이미 존재하는 사용자입니다.")

    # 2. 비밀번호 해싱
    hashed_password = pwd_context.hash(password)

    # 3. 사용자 정보 저장
    fake_users_db[username] = {
        "username": username,
        "hashed_password": hashed_password
    }

    # 4. 세션 토큰 생성 (실무에선 JWT 추천)
    session_token = f"token-{username}"

    # 5. 응답 본문
    content = {
        "message": f"{username}님, 회원가입이 완료되었습니다.",
        "status": "success"
    }

    # 6. 응답 객체 생성 + 쿠키 + 헤더 설정
    response = JSONResponse(content=content)

    # 쿠키 설정
    response.set_cookie(
        key="sessionid",
        value=session_token,
        httponly=True,
        max_age=3600
    )

    # 헤더 설정
    response.headers["X-API-Version"] = "1.0.0"
    response.headers["Content-Language"] = "ko-KR"
    response.headers["Cache-Control"] = "no-store"

    return response
FastAPI에서 JSON 응답과 함께 여러 개의 커스텀 헤더 설정하기
from fastapi import FastAPI
from fastapi.responses import JSONResponse

app = FastAPI()

@app.get("/api/info")
def get_api_info():
    # 응답 내용
    content = {
        "service": "MyApp",
        "description": "This API provides service info.",
        "status": "running"
    }

    # 응답 헤더 설정
    headers = {
        "X-API-Version": "1.0.0",           # 버전 정보
        "Content-Language": "en-US",        # 언어 설정
        "Cache-Control": "no-store"         # 캐시 금지 (중요 데이터)
    }

    # JSON 응답 반환 (헤더 포함)
    return JSONResponse(content=content, headers=headers)
pip install passlib[bcrypt]
FastAPI 자체에는 비밀번호를 안전하게 해싱하는 기능이 내장되어 있지 않기 때문에, 외부 라이브러리인 passlib을 사용합니다.
passlib은 다양한 암호화 알고리즘을 제공하는 Python 라이브러리[bcrypt]은 추가 옵션으로,bcrypt라는 해싱 알고리즘을 포함해서 설치하는 옵션
→passlib이bcrypt를 내부적으로 사용하기 위해 필요
✔️ 요약: 안전한 비밀번호 저장을 위한 필수 보안 라이브러리
FastAPI에서 JSONResponse와 상태코드 제어를 활용한 다양한 응답 처리
from fastapi import FastAPI, Response, HTTPException, Form, status
from passlib.context import CryptContext
from fastapi.responses import JSONResponse

app = FastAPI()  # FastAPI 인스턴스는 한 번만 선언합니다.

# 비밀번호 해싱 설정
pwd_context = CryptContext(schemes=["bcrypt"], deprecated="auto")

# 가상의 사용자 DB (실제 서비스에선 DB 연동 필요)
fake_users_db = {}

# [1] 회원가입 엔드포인트
@app.post("/signup")
def signup(
    username: str = Form(...),
    password: str = Form(...),
    response: Response = None
):
    # 1. 아이디 중복 확인
    if username in fake_users_db:
        raise HTTPException(status_code=400, detail="이미 존재하는 사용자입니다.")

    # 2. 비밀번호 해싱
    hashed_password = pwd_context.hash(password)

    # 3. 사용자 정보 저장
    fake_users_db[username] = {
        "username": username,
        "hashed_password": hashed_password
    }

    # 4. 토큰 생성 (예시)
    session_token = f"token-{username}"

    # 5. 쿠키에 토큰 심기
    response.set_cookie(
        key="sessionid",
        value=session_token,
        httponly=True,
        max_age=3600
    )

    # 6. 응답 반환
    return {"message": f"{username}님, 회원가입이 완료되었습니다."}


# [2] API 정보 반환 (헤더 포함)
@app.get("/api/info")
def get_api_info():
    content = {
        "service": "MyApp",
        "description": "This API provides service info.",
        "status": "running"
    }

    headers = {
        "X-API-Version": "1.0.0",           # 버전 정보
        "Content-Language": "en-US",        # 언어 설정
        "Cache-Control": "no-store"         # 캐시 금지
    }

    return JSONResponse(content=content, headers=headers)


# [3] 아이템 업서트 (삽입 또는 수정 + 상태코드 제어)
items_db = {
    "foo": {"name": "Fighters", "size": 6}
}

@app.put("/items/{item_id}")
async def upsert_item(item_id: str, name: str, size: int, response: Response):
    if item_id in items_db:
        # 기존 아이템 수정
        items_db[item_id].update({"name": name, "size": size})
        return {"message": "Item updated", "item": items_db[item_id]}

    # 새 아이템 추가 → 상태코드 201로 변경
    new_item = {"name": name, "size": size}
    items_db[item_id] = new_item
    response.status_code = status.HTTP_201_CREATED
    return {"message": "Item created", "item": new_item}
테스트 방법
uvicorn main2:app --reload
Swagger UI
-
브라우저에서 접속
http://127.0.0.1:8000/docs -
[POST] /signup 요청 테스트 -
[GET] /api/info 요청 테스트 -
[PUT] /items/{item_id} 요청 테스트- 같은 엔드포인트 하나로
수정(update)과생성(insert)을 동시에 처리하는 "업서트" 기능을 구현하고, 상태 코드로 구분하는 테스트
- 같은 엔드포인트 하나로
-
item_id = "foo"→ 경로 파라미터 -
name = "Fighters"→ 쿼리 파라미터 -
size = 6→ 쿼리 파라미터
PUT /items/foo?name=Fighters&size=6

item_id = "foo"
name = "Fighters"
size = 6
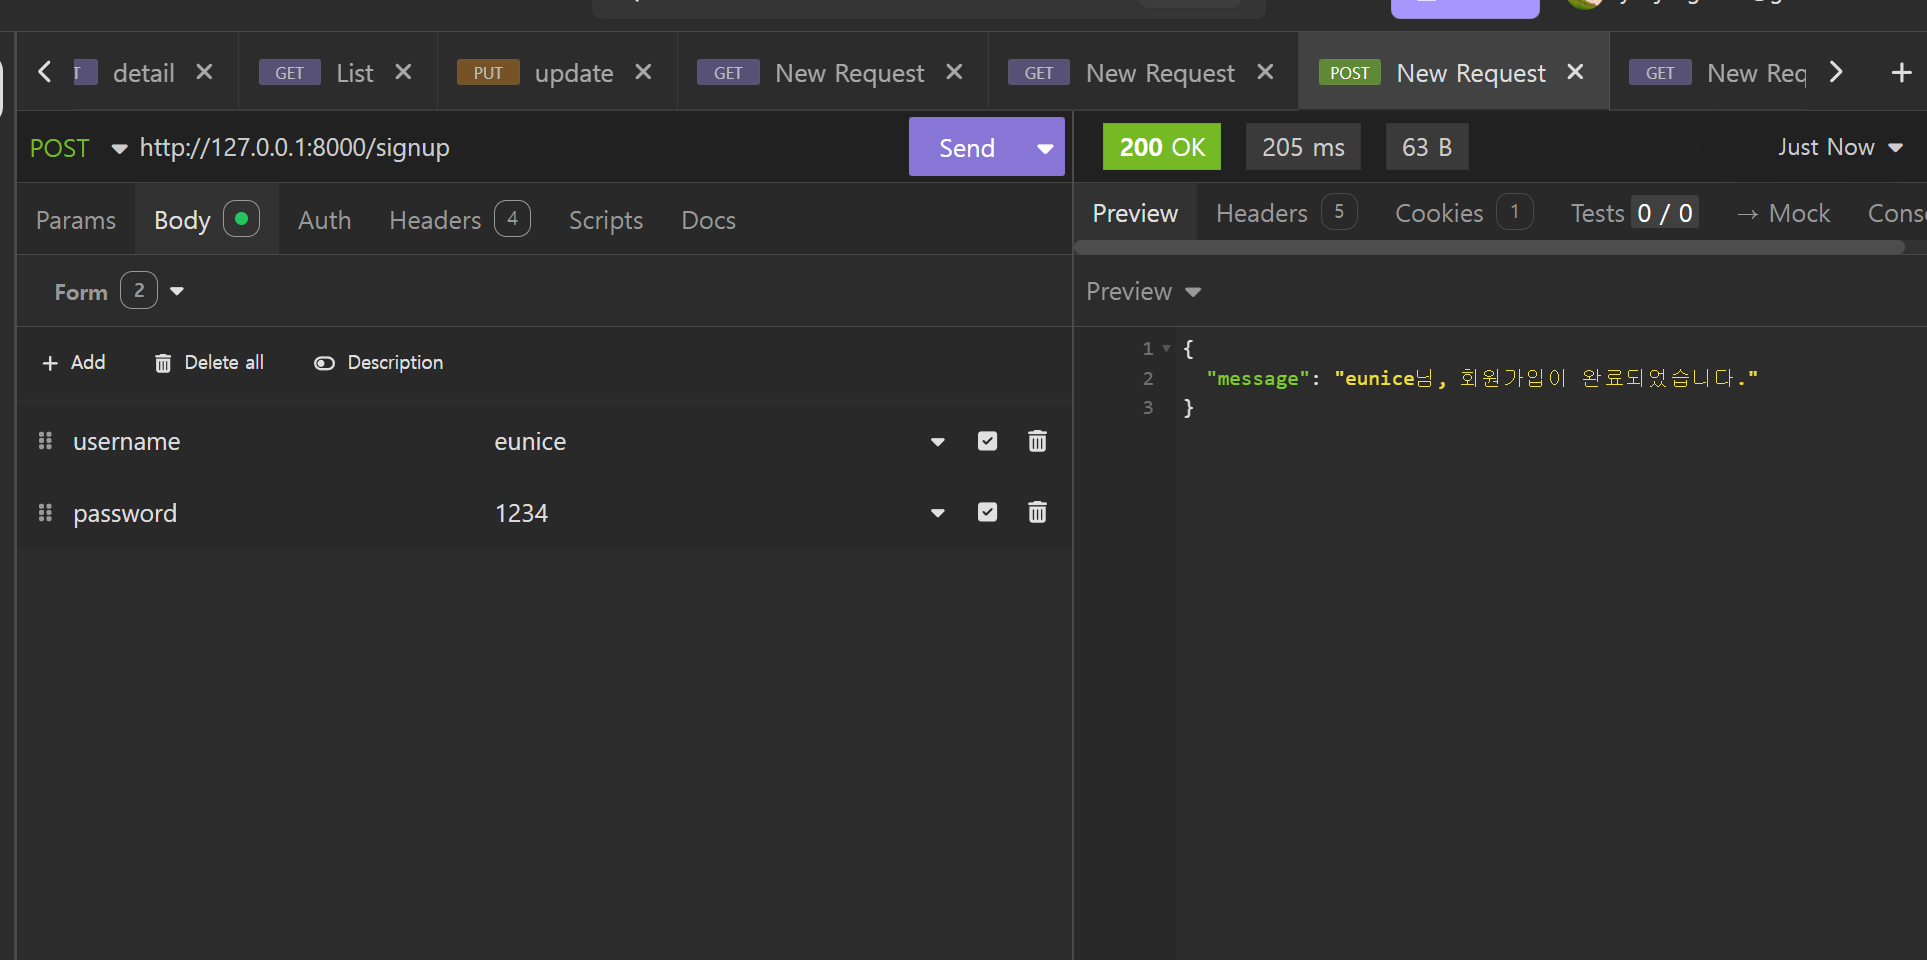
Insomnia: POST 요청
URL: http://127.0.0.1:8000/signup
Body 타입: x-www-form-urlencoded
{
  "message": "alice님, 회원가입이 완료되었습니다."
}
응답 헤더에서 Set-Cookie를 확인할 수 있습니다:
Set-Cookie: sessionid=token-alice; HttpOnly; Max-Age=3600; Path=/
 FastAPI는
 <form> 태그와 잘 호환되므로 테스트 용도로 HTML 폼을 사용해도 문제 없습니다.
하지만 프론트엔드가 React나 Vue 같은 SPA 구조인 경우, <form> 대신 axios나 fetch를 사용해 JSON 형식으로 데이터를 전송하는 방식으로 전환하는 것이 실무적으로 권장됩니다.